
Create an eTIMS invoice
The suite of digital solutions or products under DigiTax, through which one can generate eTIMS invoices, are:
- DigiTax App (Compatible with Android and Android POS devices),
- DigiTax Dashboard (Responsive, Web-Browser based, Desktop application)
- DigiTax API (for system-to-system integration without the issue of platform hopping), and
- DigiTax Plugins like DigiTax WooCommerce, DigiTax Odoo, DigiTax Quickbooks, DigiTax Sage Online, among others.
eTIMS invoice details
If you have joined any DigiTax demo in-person or virtually by our team or a referring DigiTax customer, then you know how to generate an invoice via the DigiTax Dashboard. If you have not, below is a link to a webinar recording in which a DigiTax team member talks about DigiTax and how to use it.
You can fast-forward or rewind at your convenience. Please note the following key timestamp on the video linked above:
- 15:51 - Testing how to generate invoices
eTIMS invoice sections
Below is an eTIMS invoice with sections highlighted.
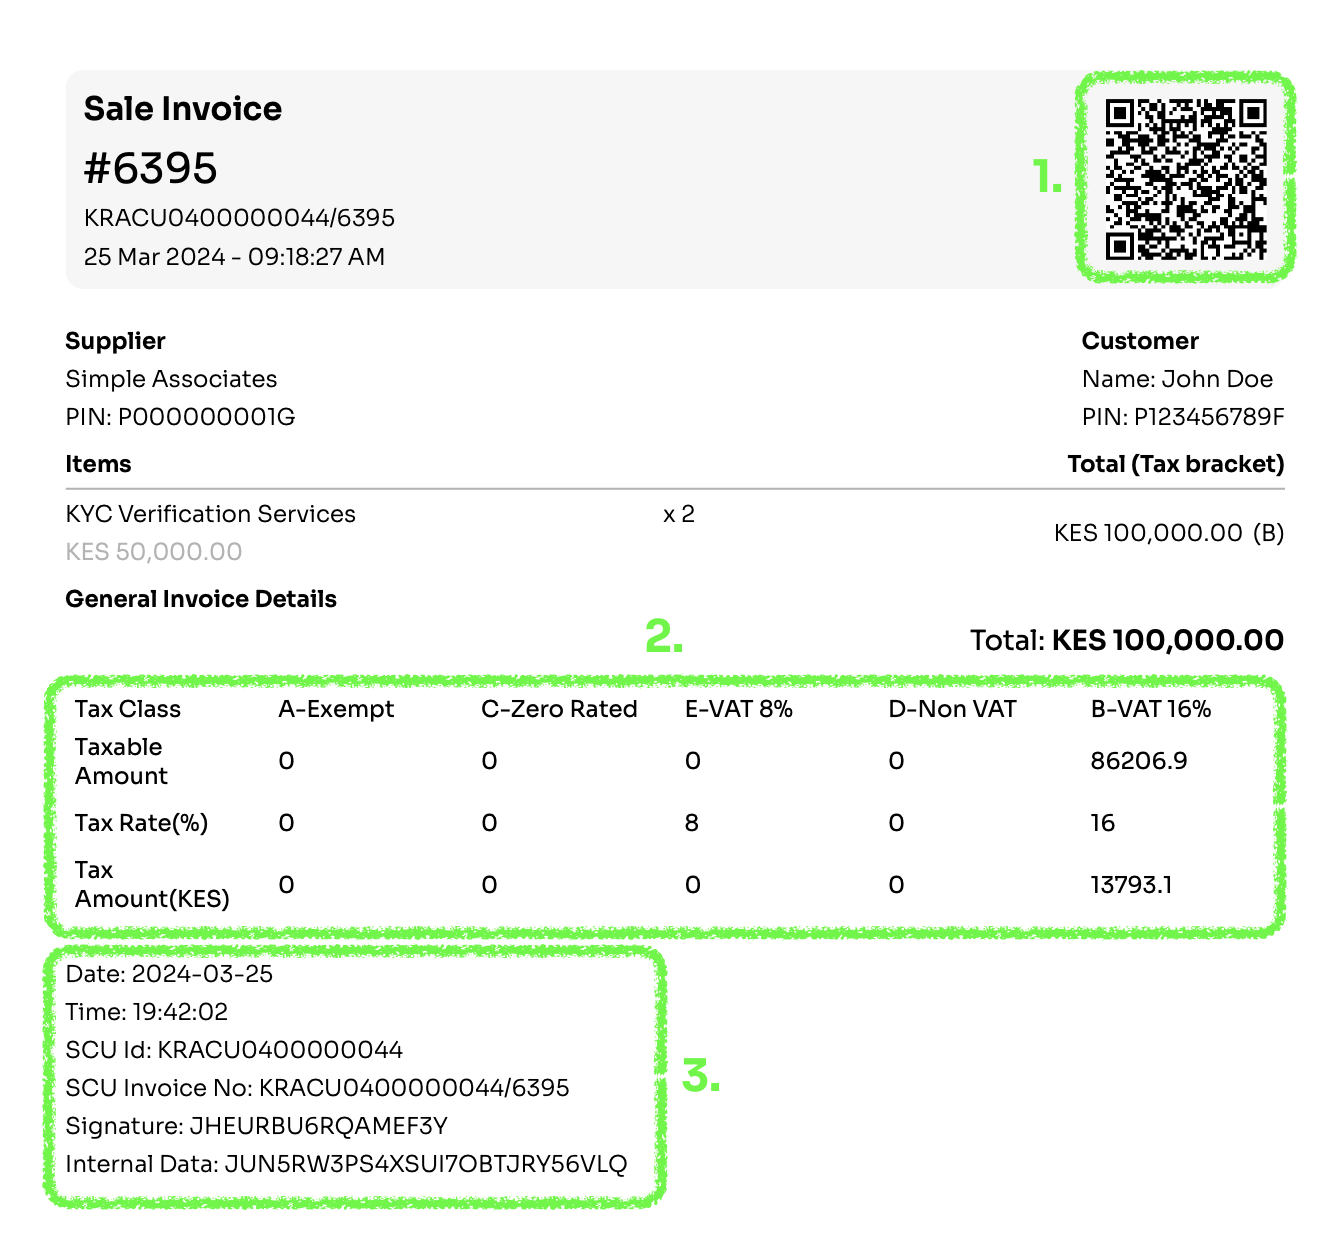
An eTIMS invoice has three key components: (They are highlighted above)
- A QR code redirecting to a URL which when opened confirms the status of the invoice.
- The ultimate end URL is on the eTIMS platform with a format
<https://etims.kra.go.ke/common/link/etims/receipt/indexEtimsReceiptData>?Data={KRAPIN}{KRA Branch ID}{Signature} - OR a DigiTax Receipt link, which can be set up as an Offline URL, with a format
https://etims.ke/r/{business_id}/{trader_invoice_number}/https://etims.ke/r/{business_id}/{sale_number}
- The ultimate end URL is on the eTIMS platform with a format
- The tax breakdown of that invoice
- eTIMS metadata that includes:
- Date and Time of transaction
- Invoice number
- Signature
- Internal Data
Creating an eTIMS invoice via DigiTax API
To create an eTIMS invoice via the API, you need to:
- Create an item
- Add stock to that item (if it is stockable). If not, skip to step 3
- Make a sale
- Get the sale details